Top Tips for Taking Sharp Moon Photos
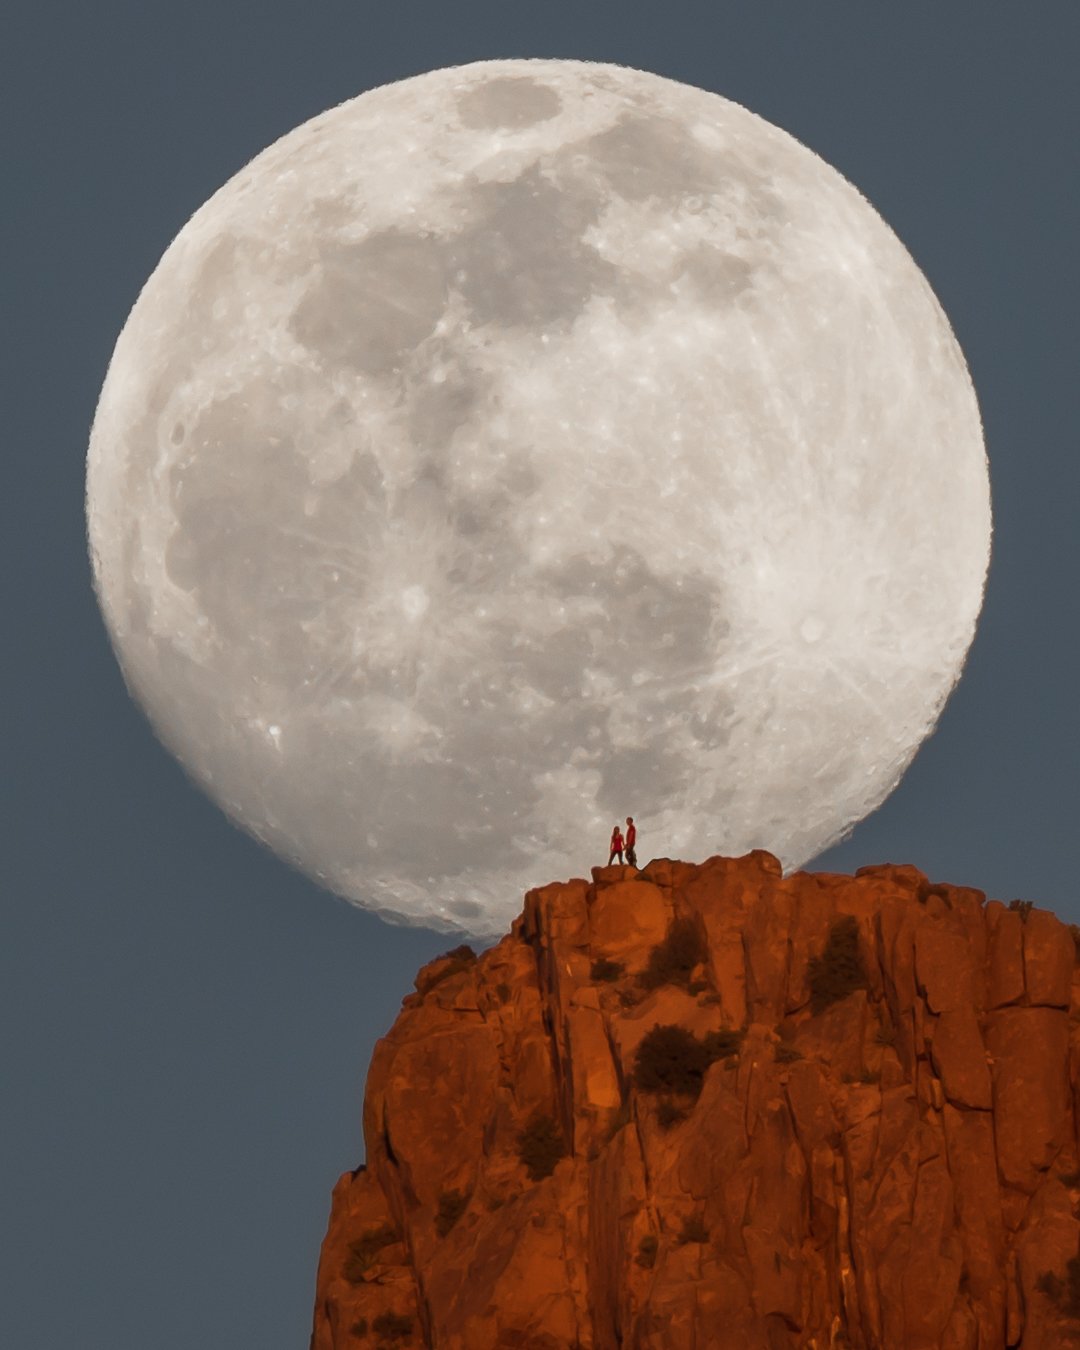
Single Exposure: 600mm 🔹 F/10 🔹 1/160 sec. 🔹 ISO 160
There are many elements that have to come together for great moon photography, and if your intention is to capture the craters and other features of the surface, whether you are shooting the moon all by itself, or with a landscape, these are the 3 most important things you need to do in order to get the sharpest photos of the moon possible.
Keep your camera still
As for any sharp photos, the goal is to keep the camera stable and as motionless as possible, and there are a few things we can do to keep the camera from moving:
⚫ Use a sturdy tripod - While it’s certainly possible to obtain sharp moon photos by shooting handheld, especially with some of the newer cameras and lenses, you can be sure you’re getting the sharpest image by using a tripod. Do you need to spend hundreds of dollars for a sturdy one? No, but I will say that generally if you’re spending less than $50, there’s a good chance it’s not going to do a great job. A lot of people, including myself, start out getting a cheap tripod, and quickly find out that a nicer tripod is well worth the investment.
⚫ If you’re tripod has a center column, don’t extend it. The higher up the column is, the more instability is introduced, especially if there is any wind. I also recommend having the tripod low to the ground if possible. If I’m out in the open without any obstacles, I usually don’t extend any of my tripod’s legs at all.
⚫ Make sure to tighten all those flip and twist locks on the head and legs of your tripod so there is no slipping possible.
⚫ Use a remote shutter release. Believe it or not, when you press the shutter button on your camera, you shake the camera some, and that will lead to reduced sharpness! Using a remote shutter release gets us around that problem. Some newer cameras actually allow you to download an app to your phone and you can control the shutter from there. There are also wired remotes (“cable release”) or wireless remotes. Your best bet is to do an internet search for “Remote shutter” along with the name of your camera to find compatible options. I’ve been using the same cable release for years that I got for $6.50 on Amazon. Regardless of which type you use, you should test it out in advance to make sure it works as expected.

A cable shutter allows you to take photos without introducing camera shake that normally occurs when you press the shutter button.
Settings
⚫ Shutter Speed: I recommend a shutter speed of 1/160th of a second or faster. If needed you can go slower, but the slower you go, the more sharpness you lose. I always try to avoid going slower than 1/100th of a second. Many people may not think of the moon as a moving object, but as the earth rotates on its axis, the moon moves across the sky quite quickly and covers a distance roughly equal to its own diameter every 2 minutes. If you were to have a slow shutter speed, you’ll lose details in the moon or they’ll be gone altogether and you’ll be left with a white disc. This is mostly what happens if you try to take a picture of the moon on your phone at night.
⚫ As far as the remaining exposure settings, a good starting point is F8 for your aperture, and I recommend starting at 100 ISO, and never going over 200 unless you have haze or thin clouds in front of the moon.
⚫ Turn off image stabilization (IS). IS is a feature which reduces blur due to camera motion. It’s not really necessary unless you are handholding your camera, and can cause problems if used when on a tripod. You may have a toggle for it on your lens, so make sure it’s off there, but you may also have an in-camera setting for it, so you may need to check your manual or the internet to see if yours has it and how to turn it off.
⚫ Focal length will of course depend on the shot you are going for and what other elements besides the moon you want to be capturing. I will just say that if you are shooting quite wide you won’t be able to see much of the moon's details. 100mm or greater should give you a good view, and the higher you go from there the more details you’ll be able to see.

Single Exposure: 600mm 🔹 F/6.3🔹1/200 sec.🔹 ISO 200
Check your focus
A lot of modern cameras and lenses can do a pretty good job of automatically focusing on the moon, but because at times they may have issues, I actually prefer manual focus. You might take several shots in automatic, and then see if you can do any better in manual, looking more closely on your computer afterwards so you’ll know which is best for your particular camera and lens setup. Whether you choose to use manual or auto, after taking a test shot, zoom in on the image to ensure you nailed the focus. If you are using manual focus and you change zoom or move your camera, make sure to recheck your focus afterwards as it is easy to shift accidentally.

Single Exposure: 600mm 🔹 F/9🔹1/160 sec.🔹 ISO 160
I hope you’ve found these tips helpful, if you have any questions feel free to leave them in the comments and I will be sure to respond. Beyond the tips above, getting out and practicing is important to improving our moon photography or any type of photography for that matter, so let’s get out there whenever we can. Happy shooting!

Single Exposure: 600mm 🔹 F/10 🔹 1/200 sec. 🔹 ISO 200